“The clocks have changed and now it’s dark most of the time. Oh no, how am I going to keep taking photos!?”
Don’t worry, just sit back, relax and read our top 3 suggestions for things to do with your camera in the dark.
1. Light Trails
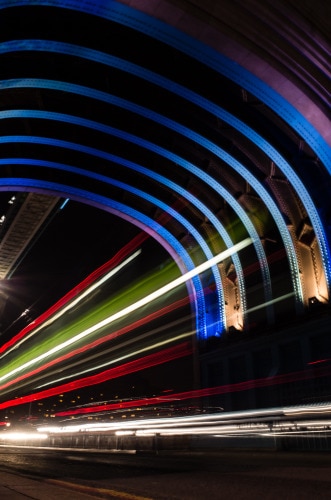
5 sec exposure at F11, ISO 100
What could be more fun than creating light trails using the lights of passing vehicles. Find yourself an interesting vantage point, anchor your camera to something solid (ideally a tripod) and entertain yourself with the lines, shapes and colours created on your sensor by the lights from passing traffic. Keeping your shutter open as the lights pass by causes the light trail effect. Use ISO 100 and experiment with different shutter speeds and apertures. This photo was created by passing traffic and our camera set manually to 5 sec, F11, ISO 100.
2. Cityscapes
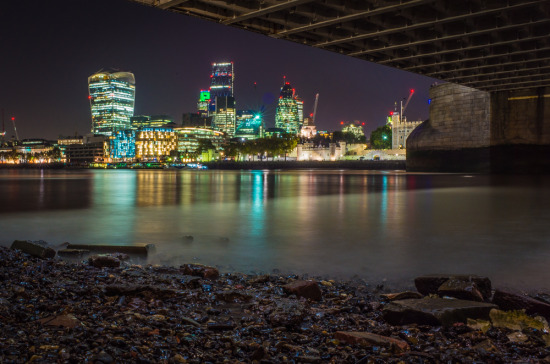
25 sec at F16, ISO 100
Capture the bright lights of the city from different angles to create gorgeous nighttime cityscapes. If you can incorporate some water into your image, not only will you generate lovely reflections, but you will also notice a smoothing effect on the water caused by the slow shutter speed. You’ll need a tripod for this one, and a good eye for composition. Set your camera onto manual mode, and experiment with your exposure. Longer shutter speeds will blur the water, then you’ll need to match this with a small aperture to prevent the lights in the buildings from being over exposed and to keep the sky dark.
3. Light Orbs
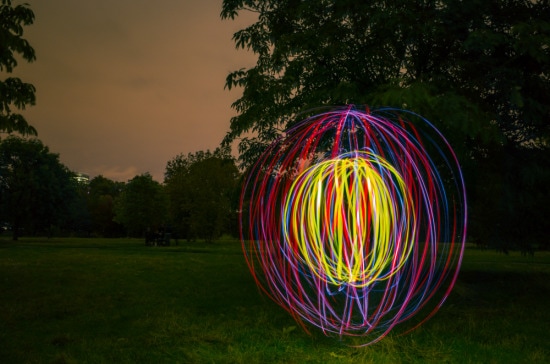
15 sec at F8, ISO 100
To create light orbs you need string, small torches, tape and some coloured gel. Attach the gel to the torches, then tie the torches to the end of the string. Put your camera on a tripod. To create the orb, keep your hand in one spot and begin to swing the torches, then rotate yourself through 360 degrees to create the orb effect. You’ll either need to work with a friend to press your shutter, or set your self timer so that the shutter fires after you start swinging…