Light trails are a fun way of doing something a little bit different with photography. Once you know how to create light trails you will discover that you can create shapes and patterns using the lights from passing vehicles.
If you’d like to join us and practice creating light trails, check out our night photography courses.
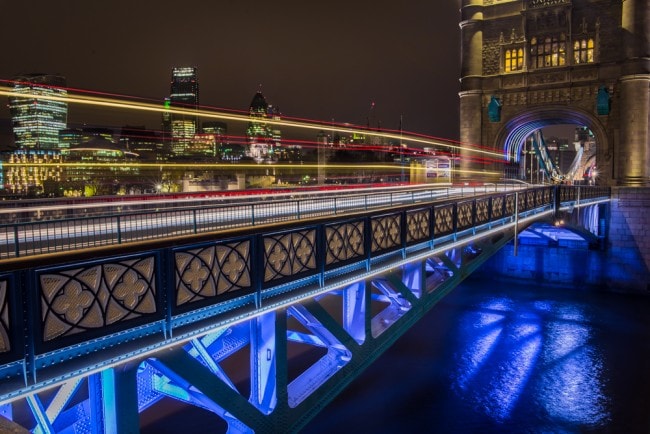
ISO 100, 8 sec, f / 11
Principles behind creating light trails
Creating light trails uses the principle that any movement happening while your shutter is open is recorded on your sensor. It is the same principle that causes motion blur in daylight. Taking a photo of a moving object using a slow shutter speed means that as the subject moves across your frame while the shutter is open its movement is recorded in your photo as ‘blur’. Only static objects photographed with a stable camera can give you a very sharp photo.
At night, if you use the correct settings, the lights of cars and buildings show up strongly in your photo compared to the dark surroundings of the night sky and the unlit parts of the environment. The brighter the light source, the brighter it will appear in your photo.
If you leave your shutter open for long enough as a moving light passes through your frame, that moving light will be recorded on your sensor. Whatever path the light takes will be recorded whilst your shutter is open, this is called a light trail. It will stand out against the dark areas of the photo that are not lit strongly at night.
Because the car or vehicle which the light is attached to is not strongly lit, it will not appear in your photo. Its image will not create a strong enough impression on your sensor to register an image as it moves through the frame.
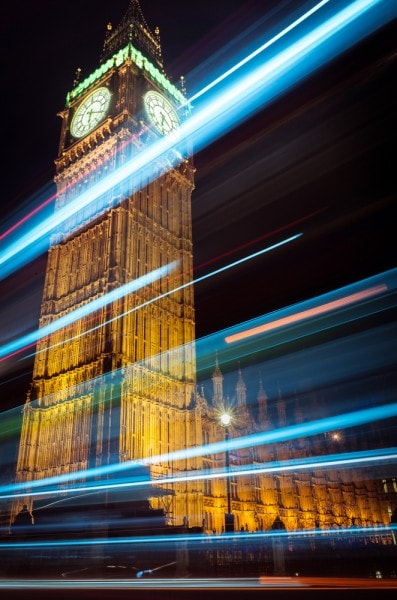
ISO 100, 8 sec, f / 16
How to create light trails
You will need the following equipment:
Camera
Tripod
Remoter shutter release (optional)
How to create light trails in 7 easy steps:
1. Set your camera in manual (M) mode. You are going to be taking full control of the exposure.
2. Find a position where you have moving vehicles but where the background is quite dark. Using the night sky or an unlit building as a background will work well.
3. Set up your camera and tripod in a safe place where vehicles pass through your frame as you look through the viewfinder. The back of vehicles look better than the front because red lights look better than white.
4. Start with the following settings: ISO 100, 8 sec, f / 16. This should give you an exposure which shows the lights of any buildings, keeps the dark areas dark, and records the lights from passing vehicles. You may need to adjust these settings depending on how bright the lights are, and how quickly the vehicles are moving.
5. Press the shutter just before a vehicle enters your frame. You should then see the light trails when you view your photo.
6. To create longer light trails, or if the vehicles are moving slowly, change to a slower shutter speed and adjust your aperture accordingly e.g. 15 sec and f / 8. To create shorter light trails, or if your have fast moving traffic, use a faster shutter speed with a larger aperture e.g. 4 sec and f / 11.
7. Experiment with your composition. Look for interesting bridges and buildings that you can include in the photo. And wait for vehicles such as buses because they have lights on different levels.
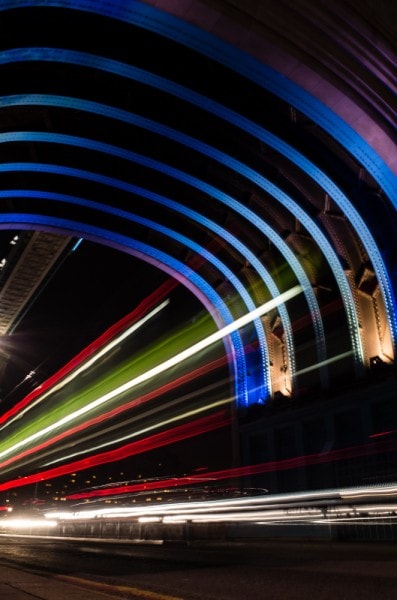
ISO 100, 5 sec, f / 11
Check out our night photography courses if you’d like to join us and practice creating light trails.

Andrew Mason is a professional photographer and the founder of the 36exp Photographers School plus the London Photo Show.
He shoots mainly commercial portraits for a living, and likes to shoot landscape, portrait and travel photography.
He is a master of lighting and portrait photography, plus leads photography trips with 36exp.